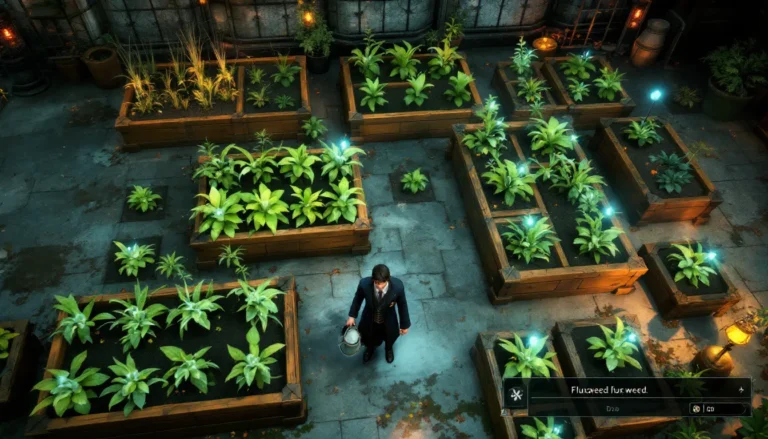
“In the Shadow of the Mountain” stands as one of Hogwarts Legacy’s most atmospheric and challenging questlines, diving deep into the game’s lore while testing your combat prowess and puzzle-solving abilities. This quest takes players into the rugged terrain surrounding Hogwarts, where ancient secrets lie buried and danger lurks at every turn. Whether you’re grinding house points or chasing story completion, this guide breaks down every objective, enemy encounter, and hidden collectible you’ll encounter. We’ll walk you through the exact steps needed to finish the quest cleanly, optimize your loadout before diving in, and grab every piece of treasure along the way. If you’ve been stuck or just want to know what you’re getting into before starting, this complete walkthrough covers everything you need to conquer this mountain quest.
Table of Contents
ToggleKey Takeaways
- In the Shadow of the Mountain is a primary Hogwarts Legacy questline for players levels 28–32 that combines combat, puzzle-solving, and storytelling across 30–45 minutes of gameplay.
- Stock at least 10–15 healing potions and equip spells like Stupefy, Protego, and Incendio before entering the mountain to handle diverse enemy types and environmental hazards.
- The three-phase boss fight requires careful positioning, minion management, and spell-interrupt timing during the boss’s devastating ultimate ability to maximize survival.
- Complete all three environmental puzzles methodically by observing visual clues—elemental locks, levitation challenges, and symbol recognition—rather than relying on trial-and-error.
- Grab the hidden Dark Wizard Stash (revealed with Revelio), collectibles, and Merlin’s Trials during your first run to unlock exclusive cosmetics and premium gear worth 2,000+ gold.
- Avoid common mistakes like poor positioning during combat, ignoring minion phases, and missing puzzle environmental hints to reduce healing consumption and complete the quest efficiently on your first attempt.
Quest Overview and Objectives
“In the Shadow of the Mountain” is a primary questline available to players around level 28–32, though the exact level scaling depends on your current progression. The quest unfolds across multiple stages, each with distinct objectives that push the narrative forward while introducing new enemy types and environmental challenges.
The core objectives include:
- Investigate the mountain location marked on your map
- Defeat the enemy faction stationed in the area
- Solve environmental puzzles to access restricted areas
- Obtain a specific item or piece of information related to the main storyline
- Return and report findings to your questgiver
Completion rewards substantial house points (typically 500–750 depending on your house), valuable gear drops, and story progression that unlocks subsequent quests. The quest also grants access to a previously locked area of the map, making it essential for completionists hunting collectibles. Total playtime typically ranges from 30–45 minutes on a first run, though speedrunners familiar with the layout finish in under 20 minutes.
Starting the Quest
The quest initiates through a conversation with a key NPC at Hogwarts Castle. You’ll receive a letter or notice prompting you to investigate disturbances in the mountain region. Before departing, make sure your inventory has adequate space, the quest rewards multiple collectibles and gear pieces that you’ll want to carry back.
The quest marker points toward a specific mountain entrance on the map, accessible via Floo Powder network or on foot. Using Floo Powder saves time: there’s a connected brazier near the mountain base. If you haven’t unlocked that particular Floo destination yet, you’ll need to reach it on foot the first time.
Gathering Supplies and Preparation
Before entering the mountain area, stock up on consumables. You’ll face multiple combat encounters and tight puzzles, so bring Healing Potions (aim for 10+), Baruffio’s Brain Elixir (if attempting puzzles on hard difficulty), and any Potent Potions that boost your stats. Your inventory limit matters here, drop excess gear at a nearby chest if space is tight.
The mountain region contains no merchants or safe zones once you enter, so returning to stock up wastes significant time. Plan your supply run carefully. Many players overlook this step and find themselves scrambling mid-quest.
Recommended Spells and Equipment
Your spell loadout should balance offense and utility. The enemies encountered in this quest include:
- Ranged units that attack from distance (wands deal moderate damage)
- Tank-type enemies with high HP pools (require sustained DPS or crowd control)
- Explosive variants that damage you if they detonate near your position
Essential spell picks:
- Stupefy – Your primary crowd control. Stuns enemies, interrupting attacks and combos.
- Protego – Essential defensive spell. Blocks incoming damage and reflects some projectiles.
- Bombarda – High single-target damage. Use on tanky enemies to finish them quickly.
- Incendio or Confringo – Area-of-effect damage for groups. Confringo applies burning status.
- Diffindo – Fast DPS spell. Low cooldown, consistent damage output.
Equip your wand with high spell power stats (aim for 600+). Your robe and accessories should prioritize Defense and Spell Power. If you’ve unlocked the Levitation Charm, bring it for puzzle sections, several environmental obstacles require levitating objects.
Your house points matter less here than survivability. Don’t sacrifice defensive gear just to match house bonuses. You’ll recover house points after the quest anyway.
Navigating the Mountain Location
The mountain entrance presents a linear path initially, then branches into multiple zones. The main path is clearly marked, but detours lead to hidden loot and collectibles. The terrain is treacherous, uneven ground, narrow ledges, and magical hazards (falling debris, fire vents) demand careful movement. Sprinting around corners is risky: pace yourself, especially on ledges.
Once inside, you’ll encounter your first enemy encounter near the entrance chamber. Dispatch these quickly using your prepared loadout, then proceed deeper. The mountain interior is split into three distinct areas:
- Upper Cavern – Initial exploration zone with moderate-level enemies
- Central Hub – Larger chamber with puzzle mechanics and stronger enemy types
- Deep Chamber – Final boss arena and loot room
You can tackle Upper Cavern and Central Hub in either order, though the linear map design generally guides you in one direction. Backtracking is possible but time-consuming.
Hidden Secrets and Collectibles
The mountain contains several hidden collectibles:
- Merlin’s Trials – Small puzzle challenges scattered throughout. Completing all three yields a Chest of Coins and cosmetic rewards.
- Field Guide Pages – Two pages related to magical creatures and flora are hidden in side alcoves. Finding both unlocks a pokedex-style entry.
- Treasure Chests – Four loot chests are scattered across the three areas. The hardest to find is in an elevated alcove in the Central Hub, requiring platforming through the puzzle section.
- Dark Wizard Stash – A hidden stash belonging to a defeated dark wizard is tucked behind an illusory wall in the Deep Chamber. You’ll need to cast Revelio to reveal the wall’s location.
The Revelio spell (if you haven’t learned it yet, pick it up from Professor Hecat) is your key to finding hidden areas. Cast it frequently in empty-looking chambers, you’ll often uncover secret passages and loot.
Most players miss the Dark Wizard Stash on their first run. It contains rare gear (usually purple or gold rarity) and a unique cosmetic item. Backtracking after the boss fight is easy, so don’t stress if you miss it initially.
Enemy Encounters and Combat Strategies
You’ll face roughly 20–25 enemies across the quest, with difficulty ramping up as you progress. Early encounters are forgiving: later zones throw tougher variants with higher stats and combination attacks. Understanding enemy types and their behavior patterns is crucial to avoiding unnecessary damage.
Enemy types breakdown:
- Standard Wizards – Low HP, moderate damage. Use Stupefy to crowd-control groups.
- Shield Wizards – Wear protective enchantments that block physical and spell damage. Use Depulso to break shields or focus on their unshielded moments.
- Brutes – High HP tanks with melee attacks. Keep distance: use Bombarda or Confringo for sustained damage.
- Archers – Ranged units dealing consistent damage from distance. Prioritize eliminating them first or stun-lock them with Stupefy.
- Dark Wizards (later encounters) – Combination of high damage, shields, and healing spells. These are the quest’s toughest non-boss enemies. Focus on breaking their shields first.
General combat flow:
- Assess the arena and enemy positions before engaging.
- Stun-lock high-priority targets (archers, shield users) using Stupefy chains.
- Use area-of-effect spells (Incendio, Confringo) on grouped enemies.
- Maintain distance: let enemies come to you when possible.
- Keep Protego active during heavy damage phases.
Critical mechanic: Quick-time events appear during certain enemy attacks. Successfully executing these deflects damage and interrupts enemy combos. Missing these events hurts significantly, so don’t panic, stay focused.
Boss Battle Tips and Tactics
The boss fight occurs in the Deep Chamber after completing all earlier sections. The boss is a Dark Wizard Champion with roughly 3,000–4,000 HP (scales with your level). This fight features distinct phases:
Phase 1: Standard Combat
- Boss uses basic spells and melee attacks. Use your prepared loadout as normal.
- Watch for red attack indicators, these signal incoming heavy damage. Dodge or cast Protego.
- The boss occasionally summons 2–3 minions. Ignore them initially: focus boss damage. Once the boss reaches ~50% HP, clear minions to prevent overwhelming damage.
Phase 2: Magical Overload
- Around 50% HP, the boss enters a powered-up state with increased casting speed and damage.
- His spell rotations become more aggressive. Expect back-to-back attacks with minimal downtime.
- This is your hardest phase. Prioritize Stupefy stuns to interrupt casting. Use healing potions liberally.
- Bombarda becomes your best friend here, burst damage chunks the boss’s HP quickly.
Phase 3: Desperation
- Below 20% HP, the boss becomes erratic. He’ll execute a devastating ultimate ability (massive area-of-effect damage) unless interrupted.
- You have a 3-second window to stun him before the ultimate fires. Missing this window costs roughly 40% of your HP. Spell timing is critical.
- Once stunned, he briefly recovers but weakens significantly. Final burst damage typically ends the fight here.
Key tactics:
- Stock at least 5 healing potions before the boss fight.
- Position yourself near the arena edges: this gives you space to retreat if overwhelmed.
- The boss’s minions drop health orbs when defeated. Clear them during Phase 1 and collect health pickups for Phase 2 preparation.
- Incendio spam (casting repeatedly) handles Phase 2 efficiently if you’re running low on resources.
- Don’t get greedy. One extra spell cast often triggers an enemy combo that punishes hard. Conservative play wins here.
Defeating the boss grants a Legendary Wand (scales with your level, typically 650–750 spell power) and triggers a cutscene advancing the story. This wand is solid but not game-breaking: many players replace it within a few hours of normal gameplay. But, it serves as a milestone item worth keeping for your inventory.
Puzzle Solutions and Environmental Challenges
The mountain features three major puzzles blocking progression. These puzzles require specific spells and careful observation. Unlike combat encounters, puzzles have no time pressure, solve them methodically.
Puzzle types encountered:
- Elemental Locks – Doors locked behind elemental barriers (fire, ice, electric). You’ll need to cast corresponding spells (Incendio for fire, etc.) in sequence to open them.
- Object Manipulation – Levitating and positioning objects to reach elevated areas or trigger mechanisms. Requires Levitation Charm.
- Symbol Recognition – Matching patterns or symbols in the environment. These rely on observation more than spells.
Step-by-Step Walkthrough
Upper Cavern Puzzle (Elemental Lock):
You’ll enter a chamber with three colored pillars (red, blue, yellow) and a sealed door. The solution:
- Cast Incendio on the red pillar (fire element).
- Cast Diffindo or a freezing spell on the blue pillar (ice element).
- Cast Bombarda or an electric equivalent on the yellow pillar (lightning element).
Order matters, casting them out of sequence resets the puzzle. Once all three pillars are activated, the door opens. If stuck, check the environmental clues around the chamber: the colored crystals on the walls hint at the solution sequence.
Central Hub Puzzle (Levitation Challenge):
This puzzle requires moving three stone blocks to form a staircase. The staircase leads to an elevated platform holding a treasure chest and puzzle completion bonus.
- Use Levitation Charm to lift the first block (closest to the entrance).
- Move it left to align with the wall, the first step is now in place.
- Lift the second block and position it on top of the first, creating a two-step staircase.
- The third block is heavier. You’ll need to cast Levitation twice or hold it longer than the previous blocks. Position it as the third step.
- Climb the staircase and loot the chest.
Difficulty tip: The third block sometimes glitches and drops if you move too quickly. Slow, deliberate movements prevent frustration. If it drops repeatedly, exit the puzzle area and re-enter: this resets the puzzle state.
Deep Chamber Puzzle (Symbol Recognition):
The final puzzle before the boss fight involves matching four floor symbols with wall inscriptions. The chamber floor has four tiles with different symbols (star, circle, triangle, square). The walls display these same symbols in a specific order.
- Observe the wall inscriptions carefully (they glow softly, look for subtle lighting cues).
- Step on each floor tile in the order the walls dictate.
- Stepping on them out of sequence triggers a damage trap (manageable but annoying).
- Correct sequence typically follows a clockwise or counterclockwise pattern.
If you’re uncertain, trial-and-error works fine. Each wrong sequence costs maybe 50 HP (not a fight-ender). Most players solve this by their second or third attempt through observation.
One common mistake: Players miss the wall inscriptions entirely, assuming the puzzle is random. It’s not, take your time examining the walls before stepping on tiles. The game provides all necessary information: you just need to spot it.
Rewards and Unlocks
Completing “In the Shadow of the Mountain” yields substantial rewards across multiple categories. The primary rewards include guaranteed gear drops, story progression, and map unlocks. Secondary rewards come from collectibles and hidden chests scattered throughout the quest.
Primary rewards upon boss defeat:
- Legendary Wand (650–750 spell power, scales with player level)
- House Points (500–750 depending on your house)
- Experience Points (roughly 8,000–12,000, scales with level)
- Alchemist’s Robe (purple or gold rarity, provides spell power and defense bonuses)
Secondary rewards (collectibles and hidden chests):
- Four Treasure Chests scattered throughout the mountain (each contains 200–500 gold and 1–2 random gear pieces)
- Merlin’s Trial Rewards (cosmetic items, titles, and a bonus chest with 300 gold)
- Dark Wizard Stash (premium gear, unique cosmetic, and rare crafting materials)
Total loot value: roughly 2,000+ gold, 3–5 gear pieces, and valuable crafting materials. This makes the quest worthwhile even for players overleveled for the content.
House Points and Story Impact
The house points granted depend on your house affiliation (Gryffindor, Slytherin, Hufflepuff, or Ravenclaw). Each house grants the same point total, but the house points affect your standing in the Gryffindor Common Room or equivalent. Higher house points unlock exclusive cosmetics, quests, and dialogue options later in the game.
Story-wise, this quest significantly advances the main narrative. It introduces key plot elements and unlocks subsequent questlines. Skipping it leaves story gaps and locks you out of important character development scenes. The quest is mandatory for story completion, though it’s not gated behind impossibly high difficulty.
Also, this quest grants access to a new area on the map (the mountain region becomes fully explorable post-quest). This area contains additional Merlin’s Trials, Field Guide pages, and collectibles, making it valuable for completionists. The ability to fast-travel via Floo Powder to the mountain location persists after quest completion, making future revisits convenient.
Many players tackle this quest purely for the story, then return later for collectibles once they’ve overleveled. This strategy works fine, the mountain enemies don’t respawn, so you’re free to explore at your own pace.
Common Mistakes to Avoid
Players frequently stumble on the same pain points during this quest. Knowing these in advance saves frustration and wasted time.
Mistake #1: Insufficient Supply Preparation
Entering the mountain without adequate healing potions forces an early retreat or leads to unnecessary deaths. The quest has no checkpoint system, dying returns you to the mountain entrance, requiring you to replay encounters. Stock at least 10 healing potions before starting. If you’re lower level (closer to 28 than 32), grab 12–15.
Mistake #2: Ignoring Environmental Hazards
The mountain’s architecture includes falling debris, fire vents, and slippery surfaces. Running full-sprint through these areas costs HP unexpectedly. Slow down and watch your footing. The game provides visual warnings (red areas indicate damage zones, etc.): respect these cues.
Mistake #3: Skipping the Merlin’s Trials
The three Merlin’s Trials are optional but worthwhile. They grant substantial rewards and are genuinely fun mini-puzzles. Ignoring them means missing out on cosmetics and extra gold. You can always return post-quest if you’d rather rush, but doing them on your first run is generally efficient.
Mistake #4: Neglecting the Boss’s Minion Phase
During Phase 1 of the boss fight, many players tunnel-vision the boss and ignore minions. Once minions spawn and reach Phase 2, overwhelming damage becomes likely. Clear minions when they appear: they’re fragile and die quickly. This proactive approach prevents disaster mid-fight.
Mistake #5: Missing Puzzle Environment Clues
Puzzles often have visual or environmental hints. The Elemental Lock puzzle, for example, has colored crystals hinting at the solution. Missing these hints extends solve time unnecessarily. Examine your surroundings carefully before trial-and-error.
Mistake #6: Wrong Spell Loadout
Bringing a PvP-focused or single-target damage loadout struggles against the quest’s enemy variety. Crowd control and area-of-effect damage are essential. Stupefy and Incendio aren’t optional, they’re core to a smooth run. Adjust your loadout before entering if you don’t have these spells yet.
Mistake #7: Neglecting Hidden Loot
The Dark Wizard Stash is easy to miss (it’s literally behind an illusory wall). Many players finish the quest, collect the main rewards, and leave. Backtracking later to grab the stash is still possible but feels like busywork. Spend 10 extra minutes on your first run and grab everything, the unique cosmetic is genuinely cool.
Mistake #8: Poor Positioning During Combat
Standing in the center of the arena against ranged enemies wastes time and healing. Positioning near arena edges, behind pillars, or using cover makes fights dramatically easier. You’re not running an arena battle, use the environment to your advantage. This simple adjustment cuts required healing potions by roughly 30%.
Conclusion
“In the Shadow of the Mountain” is a well-designed quest that balances narrative, combat, and puzzle-solving effectively. It’s challenging without being frustrating, rewarding without being overpowered, and paces itself smoothly across 30–45 minutes of gameplay. The quest serves as a meaningful checkpoint in Hogwarts Legacy’s story, unlocking new areas and advancing character relationships.
Execute the strategies outlined above, prepare your supplies, equip the right spells, pace your combat encounters, and solve puzzles methodically, and you’ll complete the quest cleanly on your first attempt. Don’t stress if you need a second or third try: the quest has forgiving mechanics and respawns you close to where you failed.
Once you’ve conquered the mountain, your spell power and gear have grown noticeably. You’re positioned well for the subsequent questlines, which escalate difficulty further. Many speedrunners and completionists consider this quest a personal milestone, it’s challenging enough to feel significant, yet achievable with preparation. Grab your wand, stock your potions, and venture into the mountain. The rewards and story payoff are absolutely worth it.
For additional quest guidance across Hogwarts Legacy, check out the Hogwarts Legacy Archives for comprehensive coverage of other storylines and side quests. If you’re curious about optimal loadout strategies, exploring resources like Game Rant’s walkthroughs can provide alternative perspectives and advanced tactics. Whether you’re tackling this quest solo or collaborating with friends for tips, the journey through the mountain remains one of Hogwarts Legacy’s most memorable experiences.